
Roolz
-
Posts
313 -
Joined
-
Last visited
Content Type
Profiles
Forums
Gallery
Events
Downloads
Everything posted by Roolz
-
In this scenario, tentacles activation is handled by Thaug "Dagon's attack" spell. He can use the spell (=move and attack with a tentacle) as long as he has red gems. Pirates (or any character with swim skill) can get back into a ship by paying 1 extra gem (as indicated in the swim skill description).
- 6 replies
-
- 2
-

-
- 3 players
- difficulty3
- (and 3 more)
-
IIRC the tentacles were in the Barbarian pledge. So you should have their tiles somewhere.
-
A3 is 2xA4 so if you don't have access to an A3 printer, you have to split the page in two, then print & glue. This can be done via Acrobat (not Reader though), image editors (such as Photoshop), and there are also several online tools (google "split pdf a3 to a4").
-
I've done a similar step-by-step of Conan's pirates a couple years ago. It should be in the Conan painting subforum. But I don't have more Conan dudes to paint in my short-term to-do-list (though I still have a ton to paint). And yes, writing a detailed step-by-step is definitely time consuming :).
-
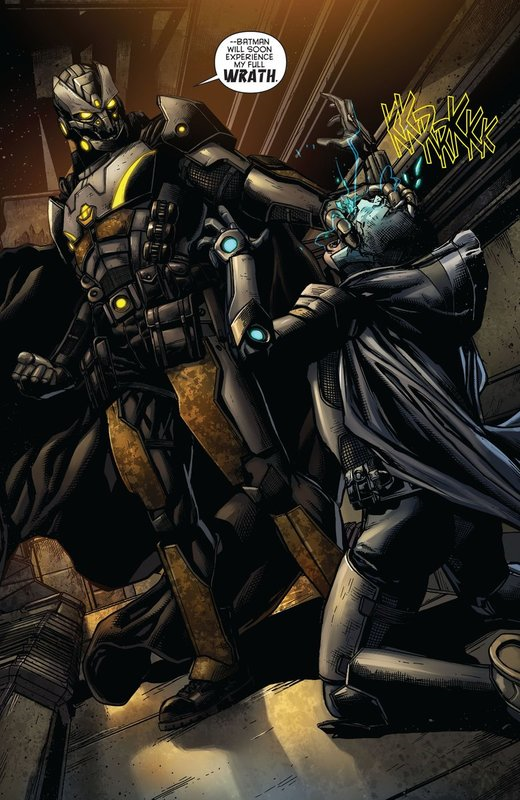
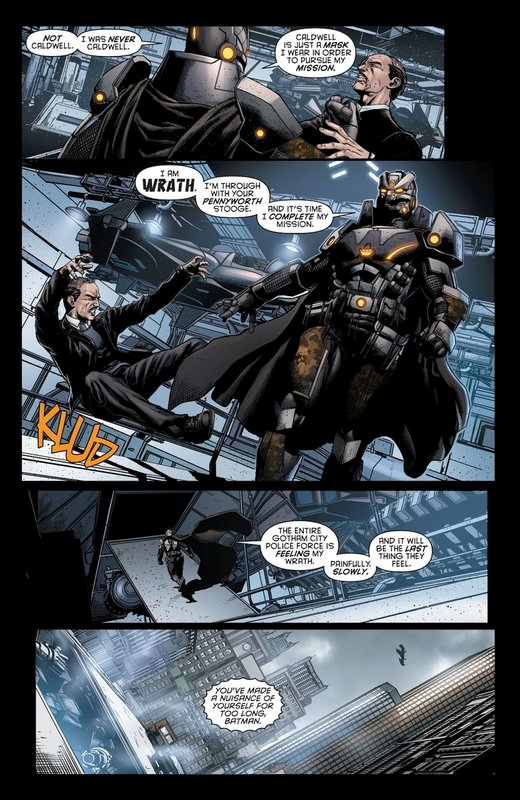
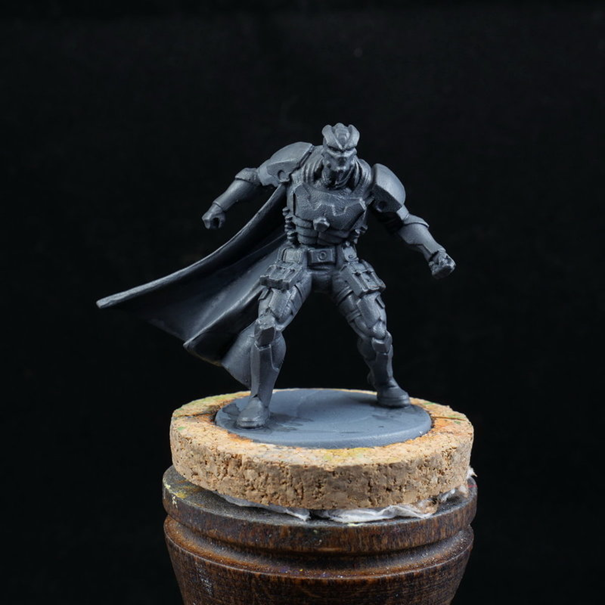
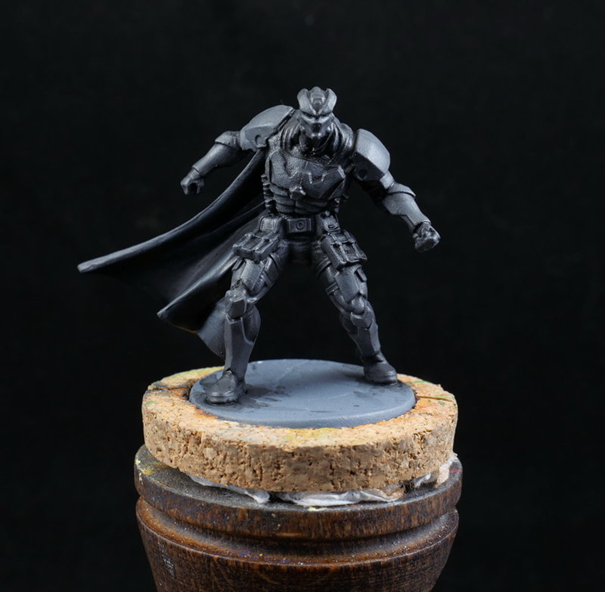
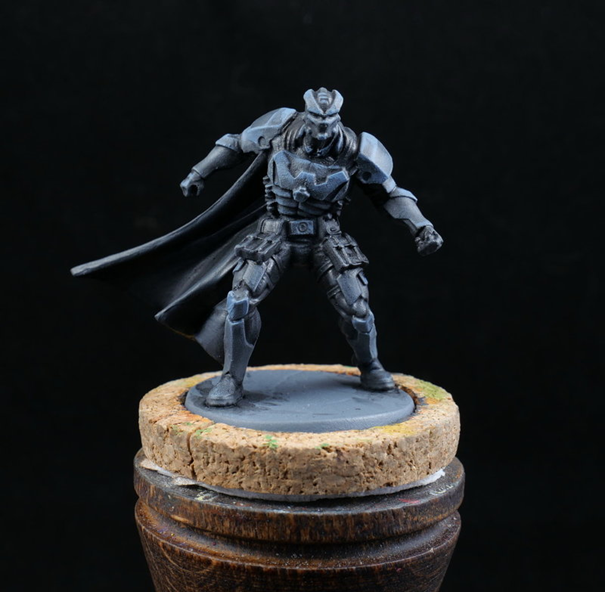
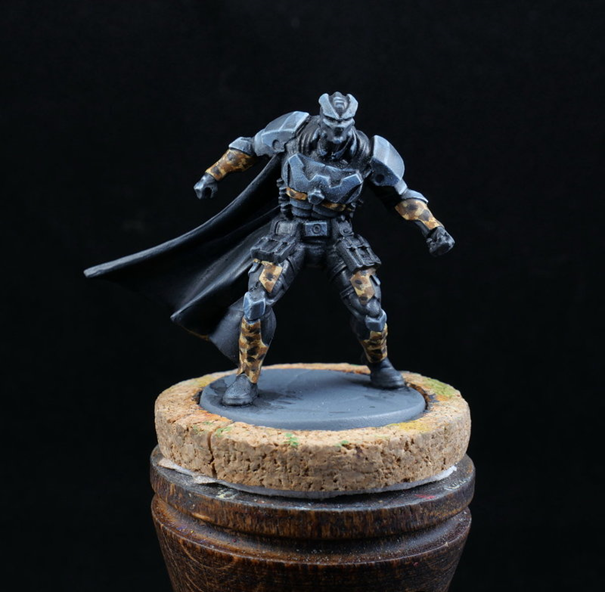
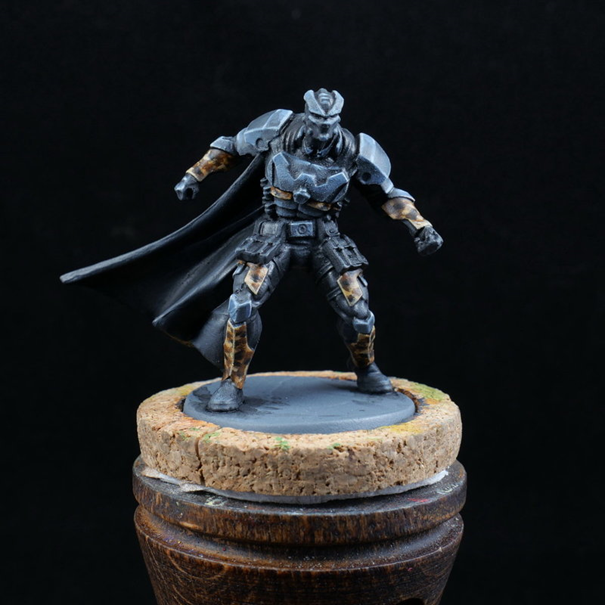
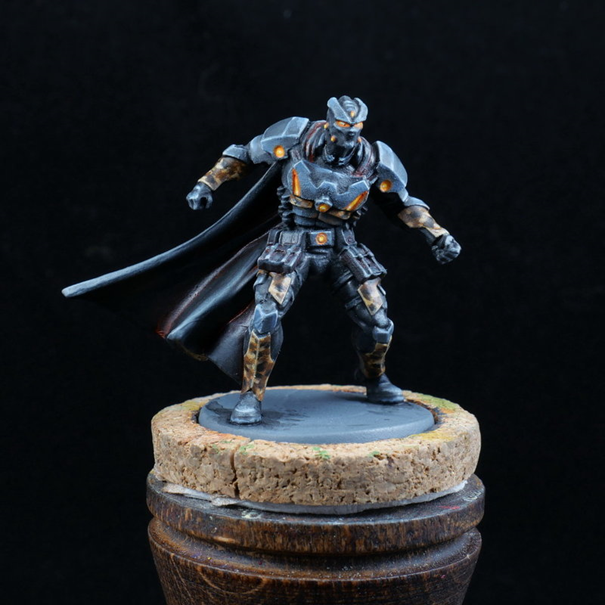
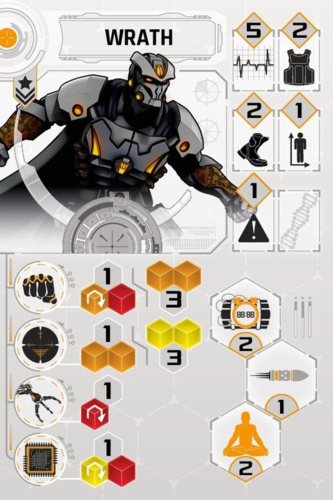
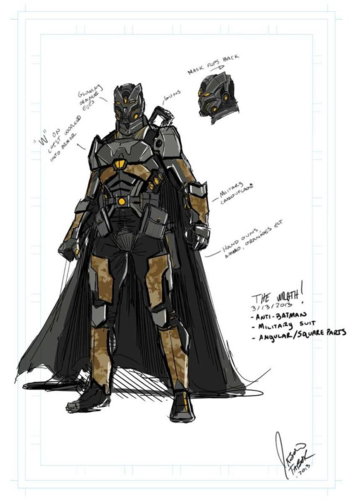
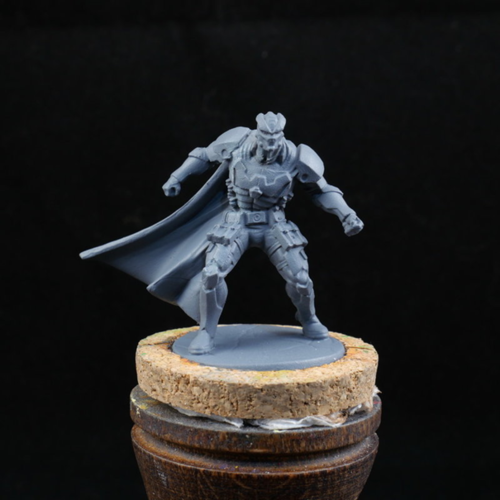
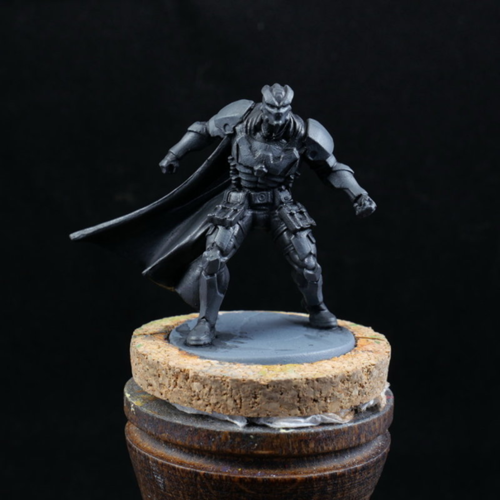
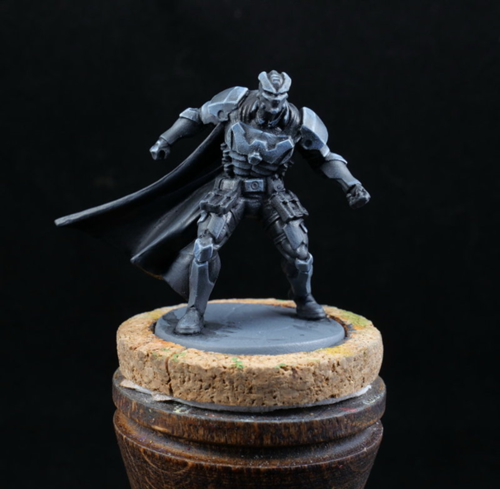
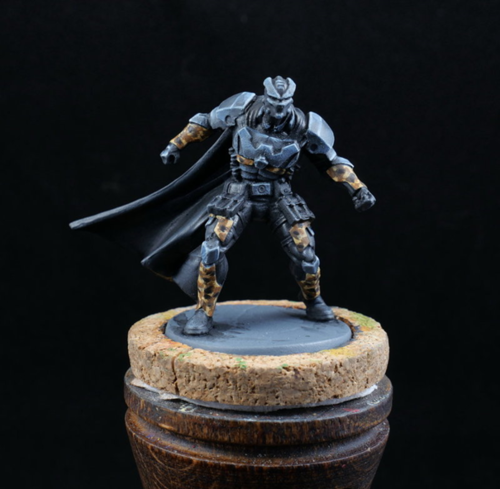
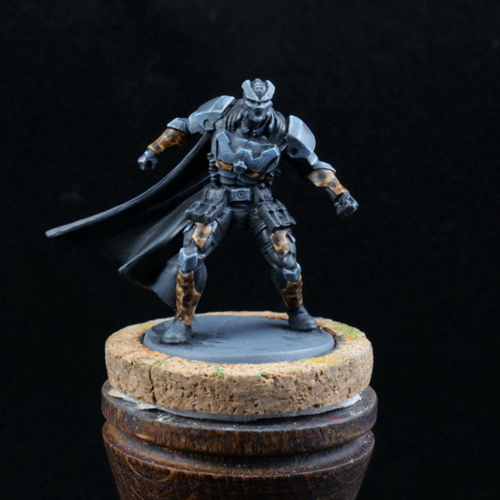
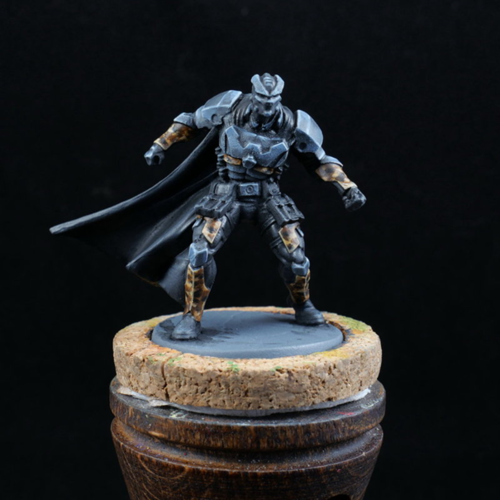
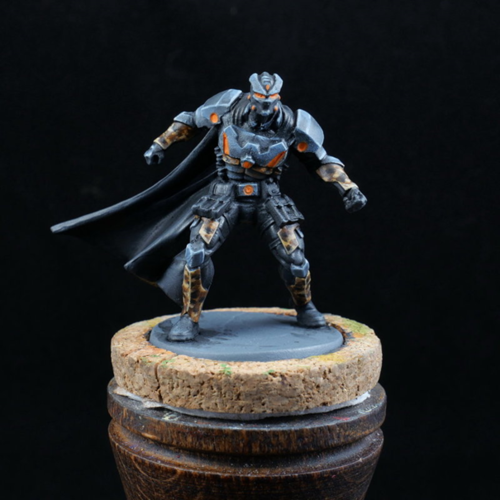
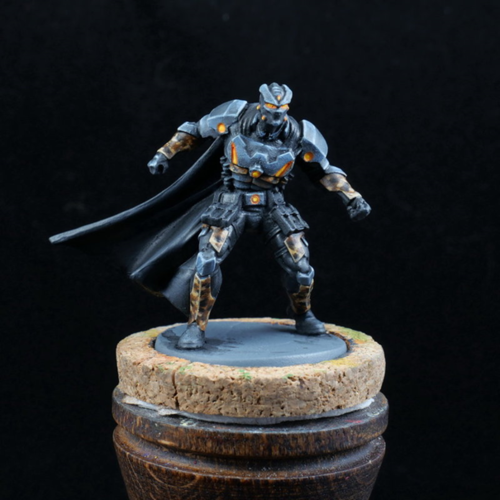
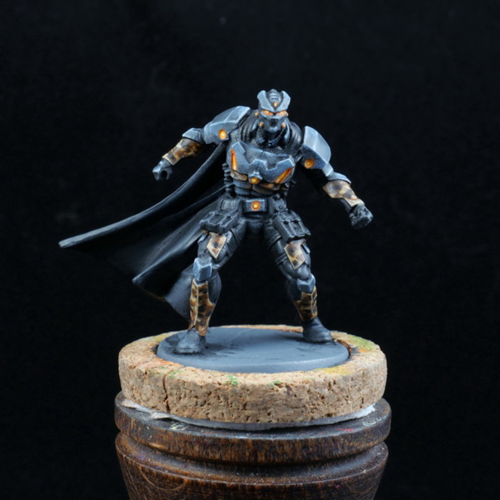
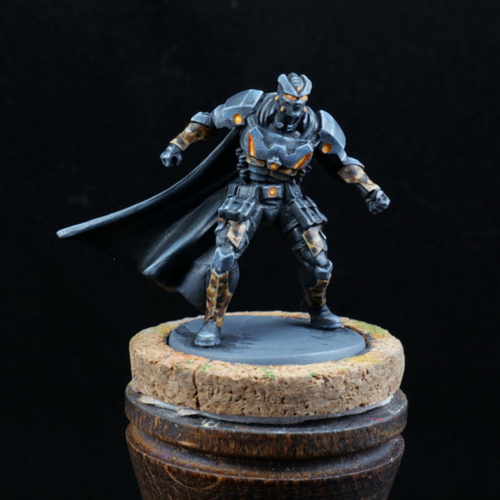
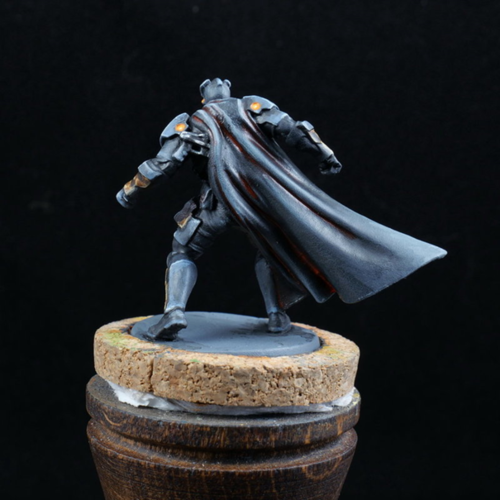
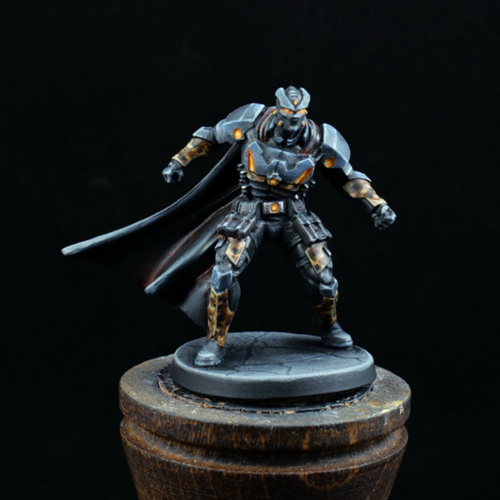
Note : Same principle as the tutos "Glaak!" (brutes with firearm) and “Crack! (brutes with chains). KKRRKKK ! – Painting of Clayface disguised as Wrath Foreword The goal of this tutorial is to paint Clayface disguised as Wrath to a higher standard than the goons. Welcome stranger, but if you intend to paint this mini in 1 hour, move along and never come back. As usual, I use as references the coloured 3D rendering of the miniature and the comics drawings. Okay… the coloured render is not overly helpful. So I dig out Dectective Comics #22 (and following ones) to scrutinize the dude. Hereunder are only 2 pages, but I used many more. References and documentation is very important when painting, drawing, and other similar activities. It plays an integral part in the process. Now these are better references. And we know that when Wrath crushes his sidekick’s head, it makes a KKRRKKK noise. Ouch. The art shows that there are armor pieces (grey-black), cloth/fabric (grey-black too, but darker), lights (yellow-orange), and some kind of brownish shaytes. One of the goals will be to differentiate the materials while using similar hues (grey-black), this is not particularly easy, I’ll see at the end if I succeed or not (or half). But what are these brown shaytes ? Burr walnut plates? The dude must have bought his armor from Rover or Jaguar, for sure. Back to google to search for references. And I find the character’s concept sketch. "Military camouflage" written near the left arm. OK, burr walnut seemed a tad unappropriate for hand-to-hand combat. Now I know where I’m going. Note : The step-by-step pictures look very blue overall, it’s due to the camera’s auto-settings. The final picture is more true to the reality. Paint ranges As usual, see the other tutos. Sequence 1- Deburring, washing, then spray-prime. See the other tutos. Here, I prime with a grey can (Unifom Grey AP, it’s a slightly blueish grey). 2- Shadows, dark grey wash everywhere (Dark Grey VM 994). 2 washes, go get an homogeneous result. 3- Shadows, black wash everywhere (Black Ink VG 094). A 1st wash everywhere, heavily diluted ; then several other washes in shadow areas, deepest recesses, and cloth surfaces (cape, thighs, bags, etc.). 4- Highlights, dark grey (Dark Grey VM 994). I start by a light-handed drybrush everywhere, then a second drybrush focussed on the lighter areas. Then some blending, to smoothen the surfaces and push a bit more the highlights. And now you’d tell me that there’s not much difference with the previous step. But there is, particularly on the cape. It’s subtle indeed, because there’s not much luminosity gap between black and dark grey. Maybe I could have skipped this step. But since I’m not 200% confident regarding how I’ll handle materials differentiation, I prefer progressing little by little instead of messing up and re-doing everything. As a general rule, in case of doubt, always try to proceed so that you can correct & adjust easily later on. 5- Highlights, medium blueish grey (Russ Grey GW), on the armor plates. I do a very-light-handed drybrush where I can and have access to (like, the head and the shoulders). It takes 1 minute tops. Then, the serious work: doing blends, then highlighting edges with the side of the brush. It definitely doesn’t take 1 minute, you need to repeat, and so on… On several of the reference drawings, the "W" on the torso is darker than the rest. I decide to not follow the references, and paint it like the rest. For 3 reasons: First, I won’t bust my balls over it ; second, the mini should still be visually “readable” ; and third I’ll still be able to repaint it easily at the end if need be. There again, always aim for easy correction, yadda, yadda. 6- Another armor plates highlight, using very light blueish grey (Pale Blue Grey VM907). Here, I only highlight the edges that catch the light most. I repeat where needed. 7- Let’s start the camo plates with a basecoat of light yellowish brown (Tan Yellow VM912). Several layers are required to get enough opacity and homogeneity, especially on the dark base we have here. 8- Continuing the camo. Spots of medium brown (Flat Earth VM983), then spots of dark brown (Brunt umber VM941), then some spots –not too many- of black (Black AP). 9- Still continuing the camo. I find it a bit too bright compared to the comics, so I glaze it with a ready-to-use dark brown wash (Agrax Earthshade GW). I re-use the same wash, but locally, only in the areas interfacing with the other elements (under the grey elbow plates, under the thighs’ pouches, under the pecs). The wash gives a satin look to the surfaces, that will disappear after the final matte varnish (I’ll decide at the end whether I re-varnish the plates in satin or not). 10- End of the camo. Highlights in beige / bone (Bone white VG 034). As for the grey armor plates, I only highlight the edges that catch the light most, and repeat where needed. At this point, I’m not overly happy with how the camo looks, but I’m fed up. Sometimes, you need to just stop. And there are several « big » things remaining that will impact the mini’s perception. 11- Beginning of the armor’s « lights ». I start with basecoats of un-diluted bright orange (Deep Orange VG 851), on the easily accessible areas (=raised areas). On the recessed areas, I apply diluted paint, capillarity will make it fill the sculpt. Of course, you have to repeat quite a bit of times to ensure opacity on this very dark base. 12- Continuing the « lights », by painting bright yellow (Deep Yellow VM 915) in the center of the orange surfaces. Here, I need my super-pointy brush... I mess up at places and put too much yellow (unavoidable, my hands are not steady enough), but I correct with diluted orange paint, applied locally. 13- End of the « lights », with some micro-dots of pure white (White VM 951) in the center of the yellow. Not on all “lights”, only on the eyes and on the torso thingies. Here, I need my super-pointy brush AND my magnifying goggles (too old for this shit, as Danny Glover said). These last dots make the “lights” pop a bit more. 14- Let’s start highlighting the fabric/cloth parts (cape, bags, boots, etc). First, I do blends using slightly blueish grey (Unifom Grey AP, same as the primer, but in pot), then the last highlights with blends of neutral light grey (Light Grey VM990). This step is looong… To try and differentiate the hues and materials, they greys I used here are more neutral (less blueish) that the greys on the armor plates. And I decide to keep these areas as « black looking » as possible, to raise the contrast with the armor plates. Which means the highlights are done on smaller surfaces. You can push the highlights very far (even up to white) on a black overall look, but you have to do it on small surfaces, otherwise it will look grey. 15- End of the cloth parts. At this moment, I feel that something is missing there. So I do the “dark-red-gives-depth-to-black” trick. Which means local washes or brownish red (Cavalry brown VM982) in some creases and recesses of the cloth/fabric parts. I take a risk, by going further away from the comics’ art. But worst case scenario, if it looks crappy, these local washes will be easy to cover it with pure black and I’ll think about a plan B. 16 - 17 - The dark red trick ends up looking okay. Let’s work on the few metal parts : gun in the back, grenades on the ribs, and belt buckle. I previously painted the belt buckle in grey (same as armor plates), but now I think to myself that it will look better in metal, and I just have to paint around the orange “light”, it will be easy. So : Basecoats with dark metallic grey (Gun grey VMAir072). On the gun, a couple of black washes (Black ink VG094). Then a few last highlights / dots with very light metallic grey (Chrome VMAir064). I highlight the gun’s handle with a blend of neutral light grey (Light Grey VM990). 18- And the base. Exact same method as for the other dudes. 19 - I liven up the base a bit with a torn and stained poster (my file is available in the dowloads section, if need be), and spray everything with matte varnish. I decide not to put satin varnish on the camo plates, I’m afraid it might draw too much attention compared to the orange “lights”. And new pictures with a decent light and truer colours. KKRRKKK in your face, sidekick !


-
Indeed, heroes can move the ship maximum 2 times per turn in this scenario. However, it's theoretical : It would mean that heroes manage to have a majority of minis on 2 different control areas during the same turn, and I think it's quite difficult (or at least, less optimal than killing some enemy pirates, recruiting others, while moving the ship little by little).
-
Not as far as I know. I believe most buildings in Batman are are too big to be made only with 3D printing. User Biohazard (on the french side) has designed and built several 3D maps (IIRC: crime alley, subway, ace chemicals). He designed laser-cut buildings and 3D-printed furniture, and used other commercially available elements. His topic is here : https://the-overlord.com/index.php?/topic/2117-wip-plateaux-de-jeu-en-volume-un-autre/ (in french but goodle trad will help) His files, pictures, etc. are downloadable there : http://www.biohazard.tv/batman/
-
I've re-based all my Conan painted minis with clear acrylic bases, to solve the issue of "visual consistency with the boards". However, re-basing with acrylic takes almost as long as doing a regular textured base. I believe that it you do a somewhat generic basing (for example, a bit of stone, a bit of earth, a bit of wood, a bit of grass), it will match most of the boards.
-
Having a Special Rules issue in the Editor
Roolz replied to Flawless's topic in Batman: Gotham City Chronicles
FYI, this bug (among others) has been notified to the designer of the scenario editors, he's looking into it. -
I believe that on Printerstudio.com you can print custom photo books US format (8.5x11") with portait orientation. Might be worth checking (and if yes, will probably require some work to convert the pdf to separate images).
-
On BGG, an italian user has done a full conversion of the old "Furor Sanguinis" expansion, for Claustro 1643. There's everything (rules, scenarios, sheets, tokens, etc., including modern layout) Except the big lizard mini, of course (but can be easily proxied). In english, there : https://boardgamegeek.com/filepage/208431/furor-sanguinis-expansion
-
- 1
-
-
Info from the author of the campaign : "I am Nesh-Shogta. User Clavain is doing a translation right now, I will start to make a proper design ASAP. Hopefully, the english version will be released in mid october.Thanks for your interest."
-
When I translate stuff from EN to FR, I first use an online translator, this gives a not-so-stellar result (OK, crappy 🙂), but it's super quick and enough to help me getting started. I guess that from FR to EN , one can proceed +/- the same way.
-
User Nesh-Shogta (on french side of the forum) created a new 15-scenario campaign (yes, 15). There: https://the-overlord.com/index.php?/topic/4042-campagne-les-sables-de-la-désolation/ It requires a Barbarian pledge, Kithai, Nordheim & Stygia, plus the Kushite witch-hunters & Crossbowmen (Witch-hunters & Crossbowmen having substitution units). It features 15 scenarios, 3 new maps, some new tokens & cards, and whatnot (so there's some printing and glueing to do). As indicated, it's in french, but if someone is willing to give a shot to an english translation...
-
Awesome!
-
1- You put a new Guard tile (from the box) at the end of the river, with 2 guard minis associated. This doesn't require reinforcement points. The 2 new guards arrive on reinforcement entries (flame tokens on bottom & top-left of the board, the top-left can only be used once). 2- Yes. Note that if he kills the priest during interrogation (3 successes on die), he doesn't know if he was the "right" one until he has left the inn. 3- Mmmm. You can have 4 guards tiles maximum. 2 tiles on start of the game,+2 with special event. Each is associated with 2 minis. So I'd say 8 guards minis max, technically. However Conan will kill several of them, so chances that 8 guards minis are present at the same time are close to zero, IMO.
-
Thanks for the quick answers !
-
Question from the FR forums : If the Heroes lose Scenario #1 due to turn limit (all heroes alive), do they lose their stuff (in that case, the crown of Xuthal) for the scenario #2 or not ? I'd say that they lose their stuff, but it's not 200% explicit in scenario #1 (it's more explicit in the subsequent ones).
-
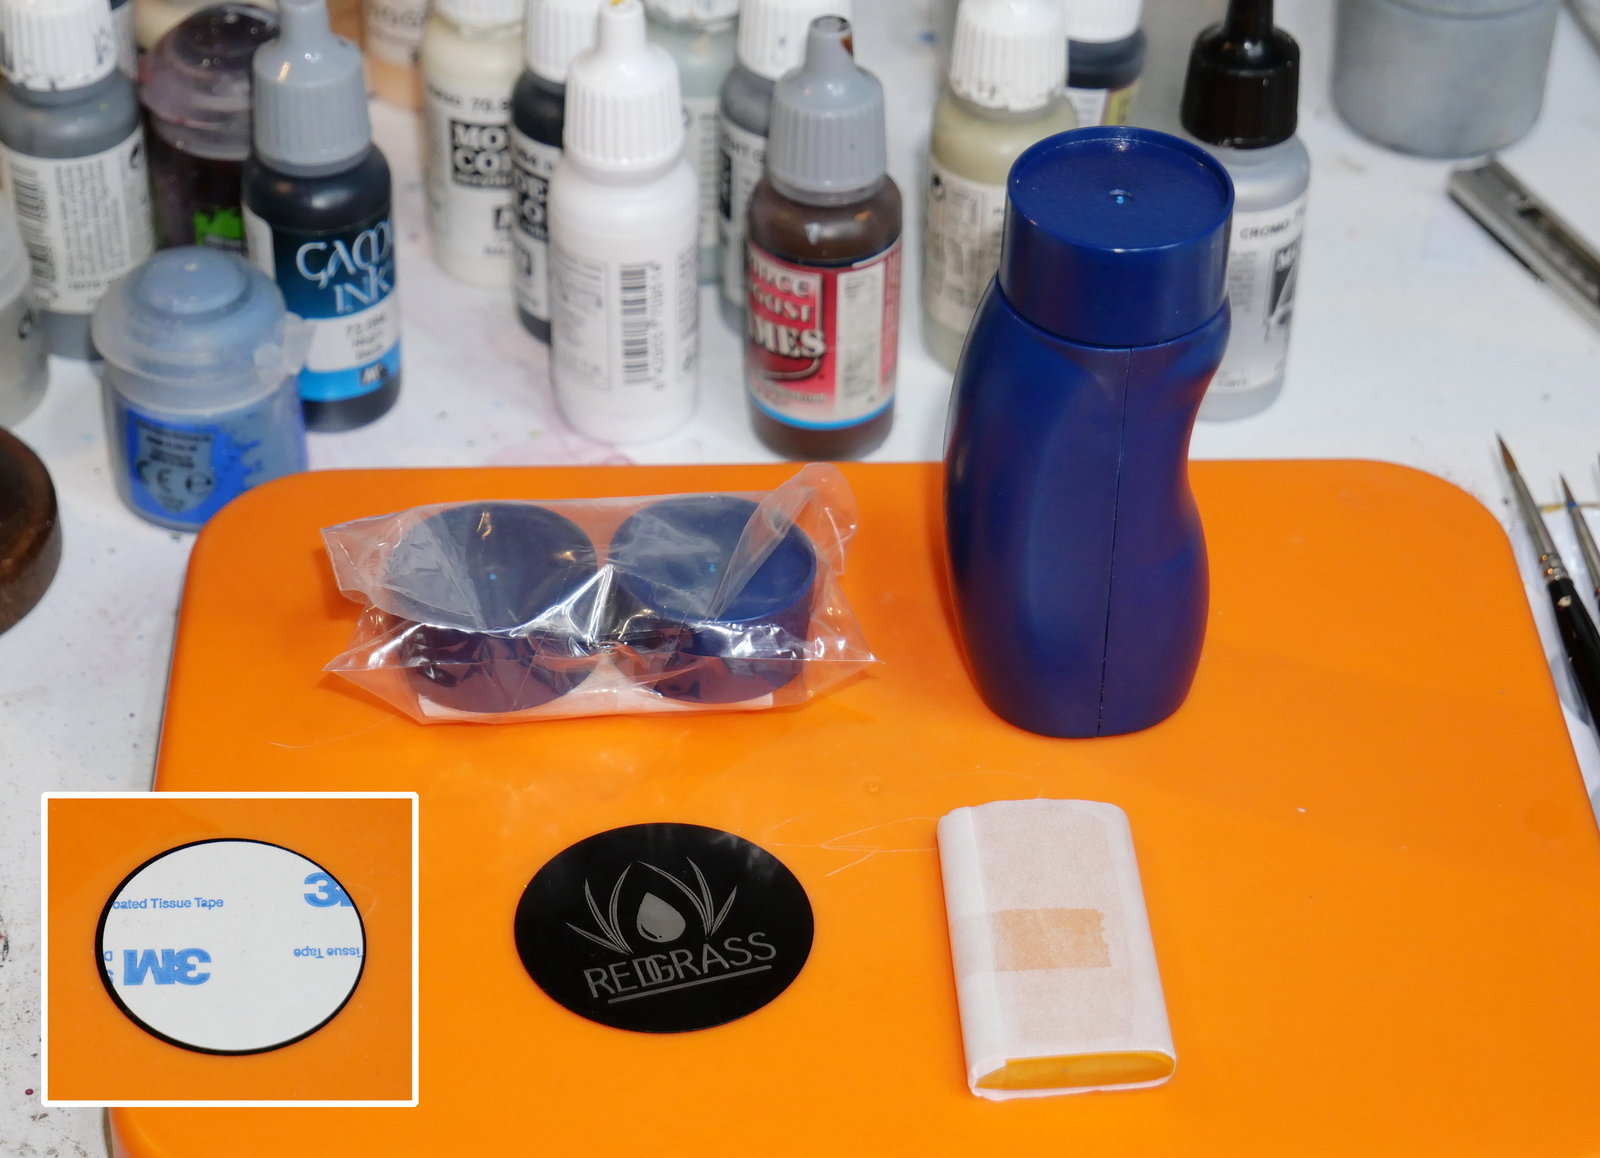
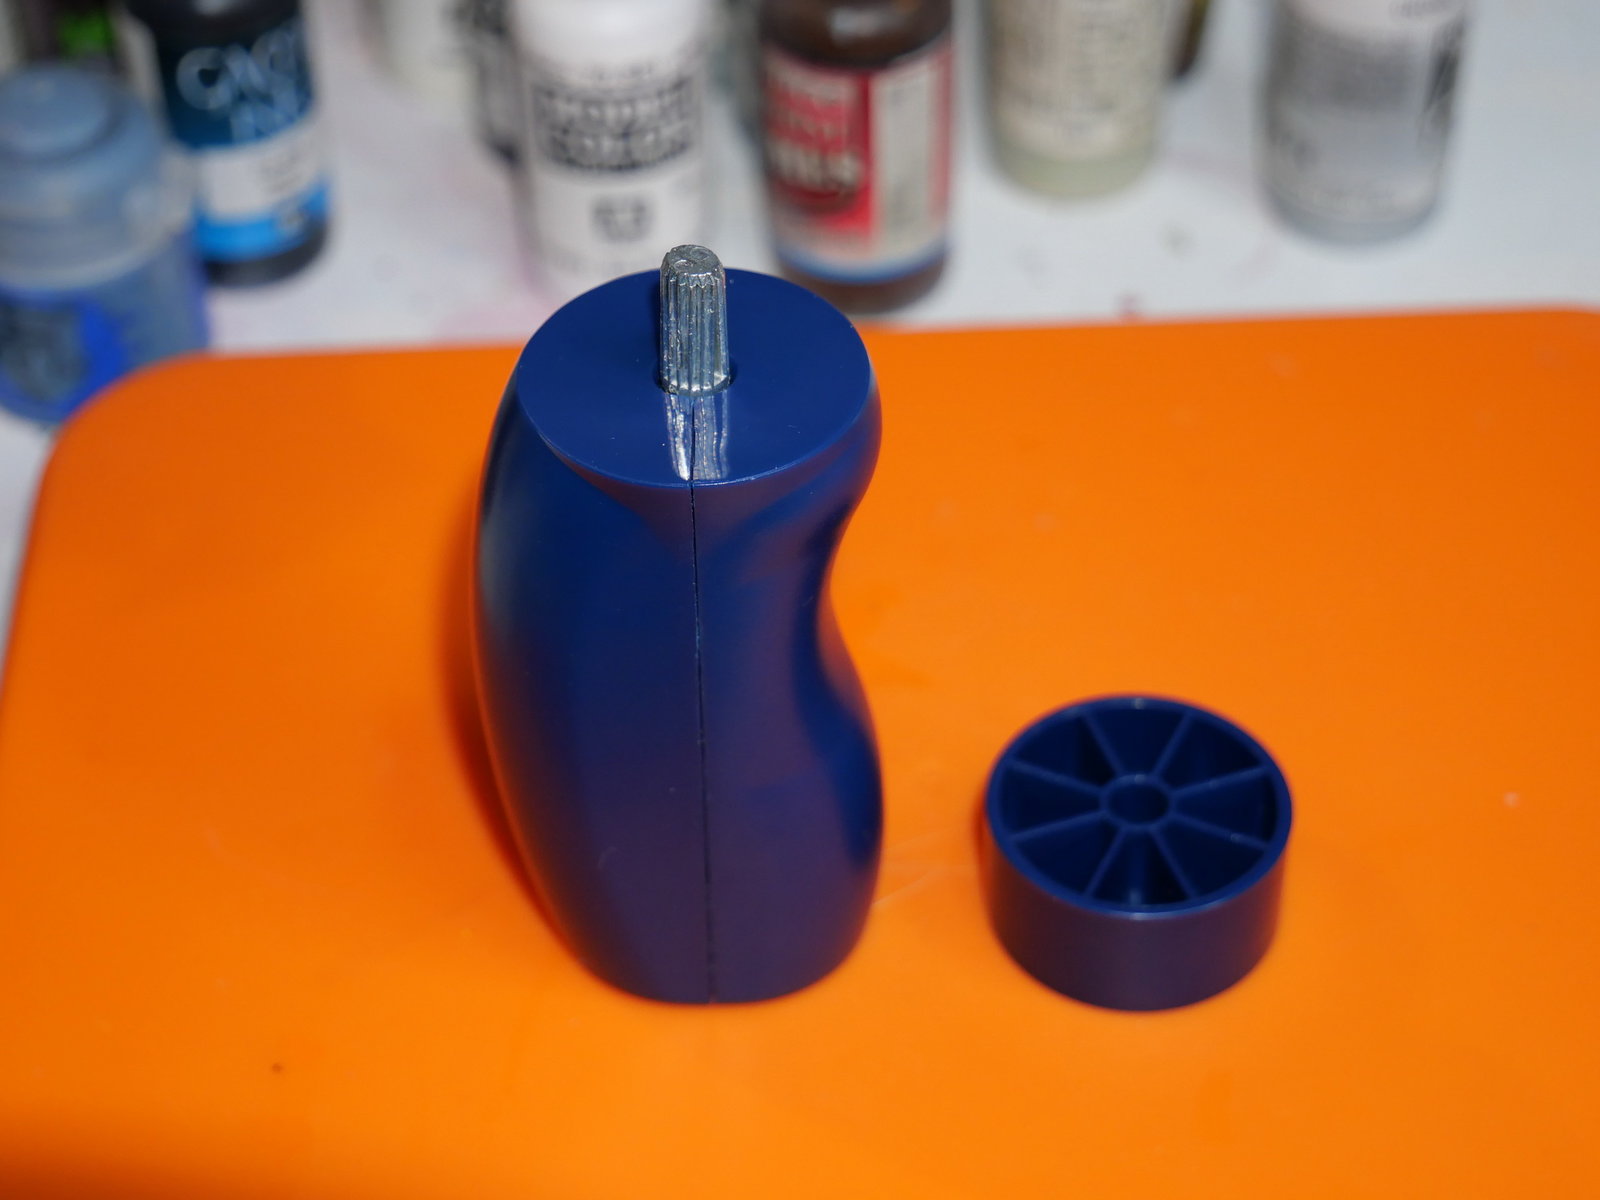
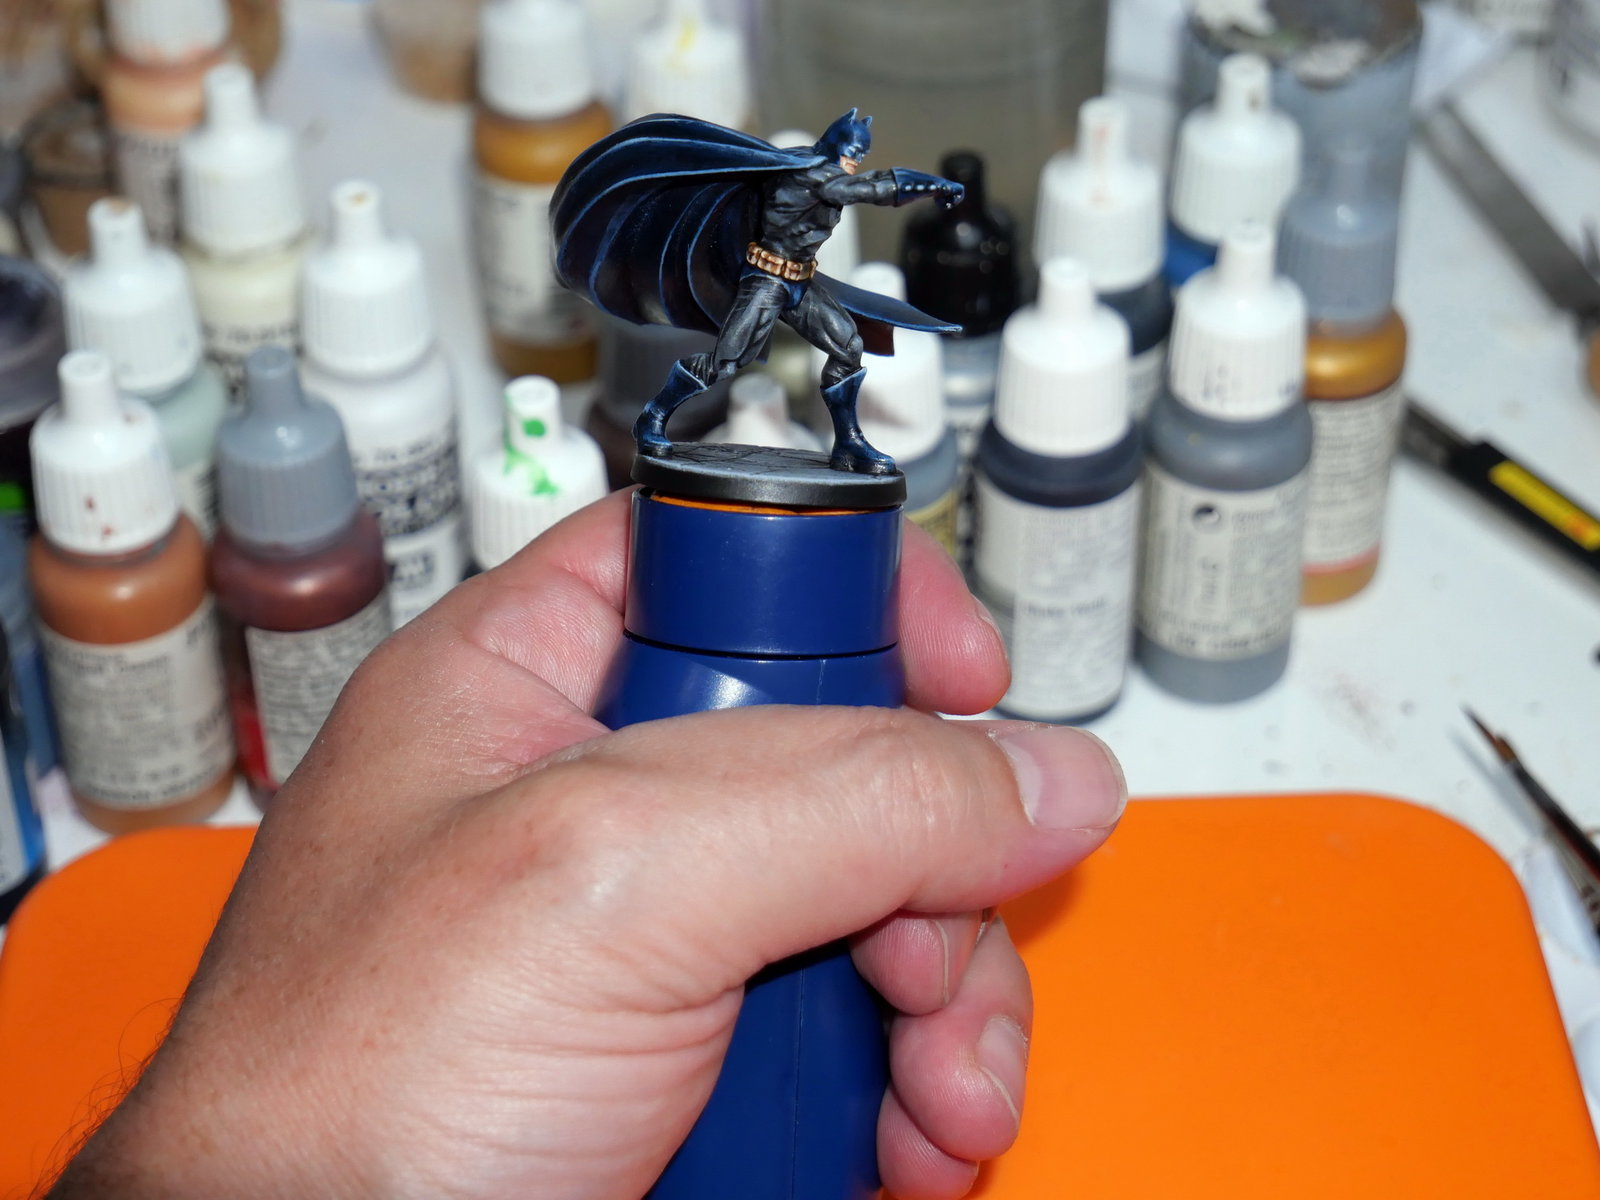
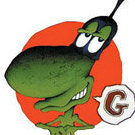
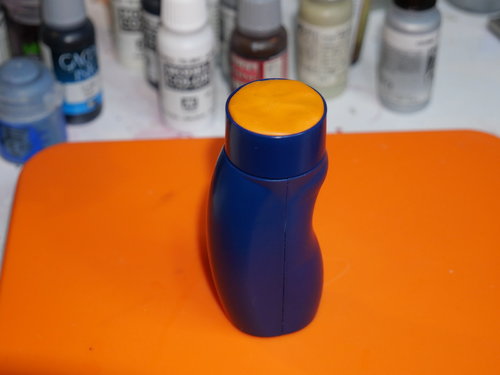
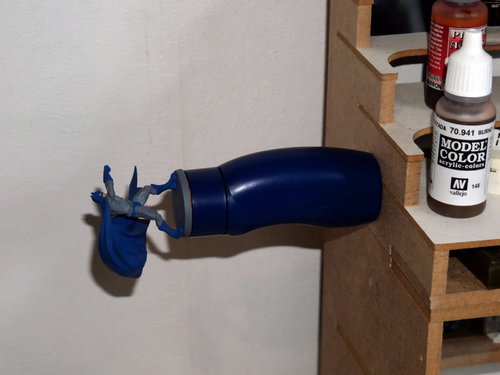
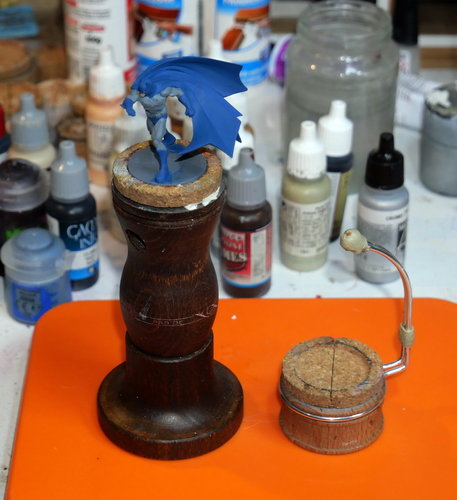
After its Everlasting Wet Palette, its brushes for miniatures, and its RRG 360 miniature handle, Redgrass Games has recently introduced a new version of its handle, aptly named RRG 360 V2. According to Redgrass Games, it is "the best ergonomic handle for miniature painting". A Kickstarter campaign is underway for this RRG 360 V2 (until June 4, 2020), it should then be available in stores like the rest of their products. They graciously sent me this handle (thank you!), so I tried my best at testing it. Disclaimer: The following is my point of view and therefore does not necessarily reflect the opinions of the rest of the universe. Disclaimer: Lots of text below. For those in a hurry, go directly to the conclusion. Preamble: I do not own the 1st RRG 360 V1 handle. But I use abundantly and since several years the Rathcore handles (they have 2 models, let us call them Small Rathcore and Large Rathcore. The Large Rathcore is the closest to the RRG handle). I also know the Citadel handle for having used it some times, but I don't own one. And of course, for a very long time I used home-made handles (old paint pots, pieces of wood, anything that fits in the hand, with blue-tac on top of it to hold the mini). There are probably other companies that make handles for miniatures, but I don't know them... Unpacking the thing: The product is delivered in a plastic package, which contains: - The handle itself (composed of a handle and a cap) - 1 piece of orange adhesive putty - 1 metal disc with adhesive bonded underneath. I also received in a separate bag: - 2 extra caps - 1 extra piece of orange adhesive putty The stuff I received. From a perceived quality point of view, it’ within the Redgrass standard: it's clean, strong, it looks well finished. The other elements (putty and disc) are in line with it. The principle of the RRG handle is as follows: 1. Put orange adhesive putty on the cap 2. Stick the mini on 3. Hold the handle and paint... 4. While painting, you can rotate the cap with your thumb or forefinger, which will rotate the mini (obviously). For those who know the V1, the new features of the V2 are: - Removable cap - Magnetization of the underside of the handle Installing the thing: I cut a piece of orange putty, I spread it on the head, and I stick the mini on it. The head is 30mm diameter, it's quite possible to stick bigger bases on it. RRG says up to 50mm. Could be more, anyway I guess there's a size & weight limit beyond which it becomes irrelevant. A big metal dragon or a giant isn't going to do much good. As with any other miniature handle, actually. With the orange putty on the cap. Using the thing: The grip is good, the handle has an adequate curved shape, quite ergonomic. That's appropriate, since it's an ergonomic handle... While painting, you rotate the cap with your thumb or forefinger to access all the sides of the mini. There is a slight resistance to rotation, it is not mounted on ball bearings otherwise it would be annoying, duh... You might still have to keep a finger on the head when holding the handle horizontally or tilted, otherwise it tends to rotate very slowly because of the weight of the mini (it happened when the mini’s center of gravity is off, like the Batman I’ve painted for this review, it certainly won’t with a more “centered” mini). Anyway, if it does, you get used to it very quickly. The rotating head saves a bit of time on a entire paintjob, because sliding just one finger is a tiny-wee-bit faster than rotating the whole handle in your hand (as it is the case with competition’s handles). In short, the rotating head is a nice little feature that won't change your life if you already use a handle, but one cannot deny that RRG are the only ones making rotating heads. One note: with 30mm bases or bigger, it is possible to touch the edge of the base and thus to put finger grease on it (so, lower paint adhesion on the edge of the base). So, you have to be a tad careful where you put your fingers. Especially for those who have big hands and/or big fingers. It's not a big deal, but I think it could have been improved with one or two minor modifications of the cap, for example by lengthening the head by 5 or 10mm, or by giving it a conical or flared shape (i.e. not cylindrical). Maybe for the V3? In hand. The cap is removable (V2 new feature), so if you have several caps, you can paint several minis almost in parallel. The "extra caps" option is therefore interesting for "assembly-line-mode" painters, no need to buy several complete handles. The handle and the cap removed. It is also possible to use just the cap alone, but then I think it loses its interest compared to a homemade handle... The bottom of the handle is flat, so it stands on the table. If you want more stability, there is a magnet inside the handle (another new feature of the V2), which allows it to adhere to metals (well, ferrous like carbon steel, eh, not stainless steel or aluminium...). Tables being generally made of wood, that's what the metal disc provided is for. It can be sticked on his adhesive side. It is not repositionable, so before sticking it, think a bit about its location (otherwise you're good for un-sticking it and re-stick with double-sided scotch tape). It is possible to make the handle hold horizontally, the magnet is strong enough for that. Personally, it suits me fine, I often have a lot of mess on my table... Spider-Handle! Once the mini’s painting is finished, I take it off the handle to varnish it. The orange putty seems qualitative to me, it adhered very well during the painting phase, it remains stuck to the head of the handle afterwards, and leaves very few traces under the mini’s base. With regular blue-tac, I almost always have some small traces and pieces that remain stuck under the base. With RRG orange putty, there seems to be a little less. According to RRG, the orange putty is reusable quite a few times. It seems credible, after this test. I must have used between 1/4 and 1/3 of the supplied piece. As a first approach I would say that the piece of orange putty provided should last a year while painting quite often (if you take care not to soak it in sand, dust, or paint). Of course, to have a more precise order of magnitude it would take a much longer test. Anyway, it is always possible to use regular blue-tac, or buy extra orange putty from RRG ‘s online store. Comparison: All handles have advantages, and the disadvantages that usually go with them (you don't get anything for nothing). Rathcore handles are made of wood. The aspect is nice, the contact of the wood is really pleasant under the hand, it is super-qualitative. Rathcore use special cork heads to hold the figs, adapted to the sizes of the bases. It's a very "clean" system but less versatile than adhesive putty. The cork heads can be removed and put back on, but it is not as quick and easy as on the RRG. The Large Rathcore fits very well in the hand (like the RRG) but doesn't stand on its own, it has a wooden stand to put it on (too bad). The Small Rathcore is much more compact and stands on its own. Both Rathcore can be equipped with a metal rod that passes over the mini and allows to turn it in all directions while keeping a great stability. This rod works great with the Small Rathcore, less so with the Large one (simply because of the long handle). You don't often need to flip a mini upside down for a long time, it depends entirely on the mini, but when you need it, it's great. All this means that if you want the whole shebang at Rathcore (all types of cork heads, several handles to be able to paint several figs in parallel, the two handle shapes, etc.), it all adds up pretty quickly! Rathcore handles. The Citadel handle is made of plastic, and uses an adjustable spring system to clamp the base. No need for adhesive putty or multiple cork heads, it's cool. But this system, like the others, has its limits regarding base size, and can sometimes tend to hurt the edges of the base, or even deform it. The Citadel handle is very compact (more "bulbous" than the RRG), fits well in the hand, and stands on its own. If you want to paint several figs in parallel, you need several handles, no choice. This adds to the bill, there again. No picture of the famous Citadel handle. Google is your friend. Conclusion: Is the RRG 360 V2 "the best ergonomic handle for miniature painting" ? Yes. No. It depends. In fact, every painter will have his preferences. According to his tastes, his use, and his budget. It's like the miniature paints, I would say that there is no bad brand (nor absolute best brand). The RRG probably won't dethrone my usual handles, but I'll certainly use it as a complement. Just like the paints, in fact (the sharp eye will spot 4 different paint brands on the previous pictures, and there are a few more out of scope). It's well designed, well made, and very easy to use. It does better than competitors on some aspects, less well on others. I'd say its main strengths are its superior versatility and a competitive price for those who paint several minis in parallel (even if you buy extra removable caps, the budget remains limited). Roolz, 27 May 2020


-
- 2
-

-
Version 1.0.0
427 downloads
Official scenario - 5 players - Difficulty 2 - SG. -
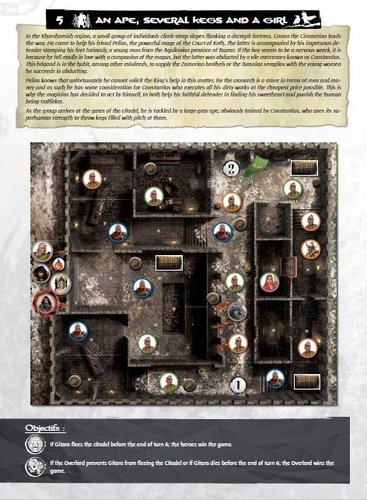
View File An Ape, several kegs, and a girl Official scenario - 5 players - Difficulty 2 - SG. Submitter Roolz Submitted 02/25/2020 Category Official scenarios
- 1 reply
-
- 1
-
-
- 5 players
- difficulty2
- (and 3 more)
-
Version 1.0.0
387 downloads
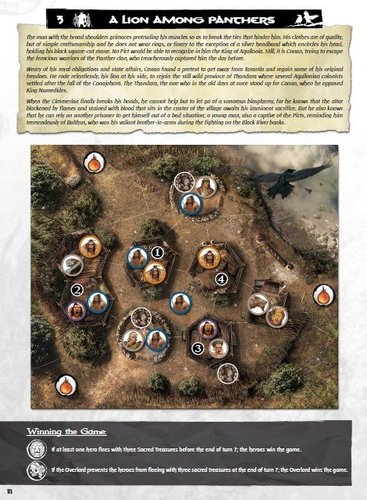
Official scenario - 3 players - Difficulty 2 - SG, King. -
View File A Lion among Panthers Official scenario - 3 players - Difficulty 2 - SG, King. Submitter Roolz Submitted 02/25/2020 Category Official scenarios
-
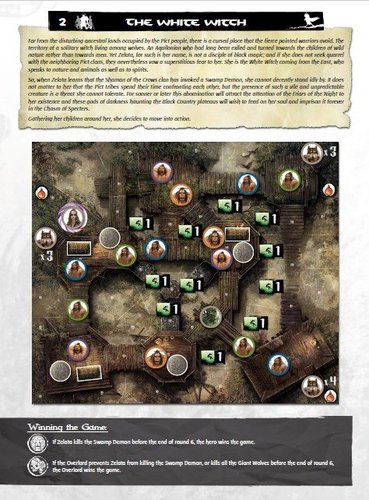
View File The White Witch Official scenario - 2 players - Difficulty 1 - SG, King, Giant Wolves. Submitter Roolz Submitted 02/25/2020 Category Official scenarios
-
Version 1.0.0
395 downloads
Official scenario - 2 players - Difficulty 1 - SG, King, Giant Wolves.